
Protect Your Feet on Rough Terrain with Top Hiking Insoles
How to Choose the Best Insoles for Hiking Boots
For long hikes or heavy packs, start with an insole that has firm arch support and a deep heel cup. It should steady your foot without pushing your heel out of the boot. For shorter, lighter hikes, a more flexible insole with moderate cushioning may feel better. In a snug boot or trail runner, choose a slim model so your toes still have room.
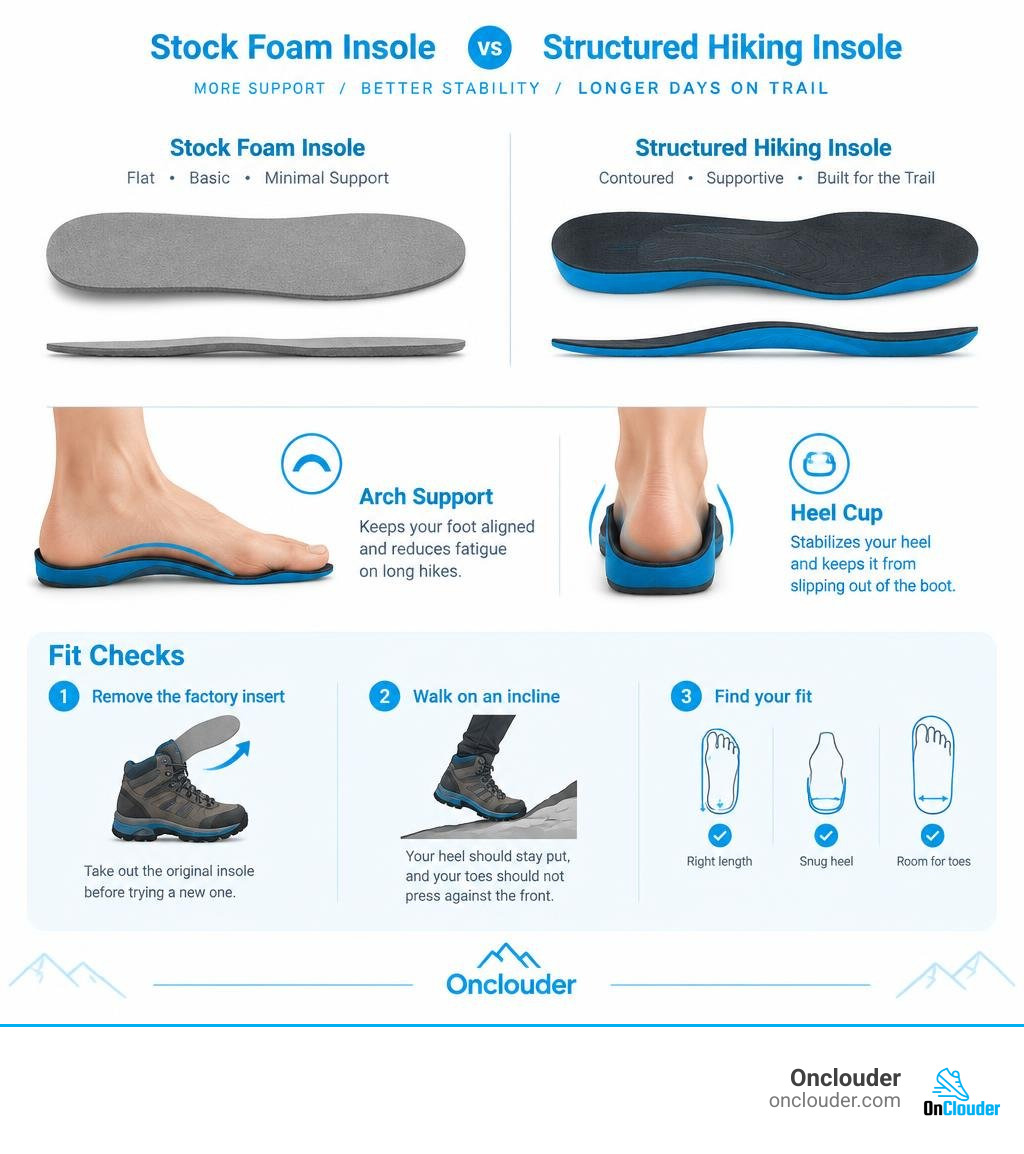
Remove the factory insert before trying a new one. Then walk on an incline: your heel should stay put, and your toes should not press against the front.
Why Factory Footbeds Fail: The Biomechanics of Trail Fatigue
When you invest $250 or $300 in a premium pair of technical hiking boots, it is natural to assume every single component is trail-ready. Unfortunately, that is rarely the case. The removable liner resting inside your brand-new boots is often a flat, flimsy piece of open-cell foam costing manufacturers mere pennies to produce. It acts more like a soft placeholder than a functional footbed, offering virtually no structured arch contour or heel stability.
Under the repetitive forces of hiking—where each step can load your foot with double or triple your body weight—that generic foam rapidly compresses into a pancake. This lack of structured support forces your plantar fascia, Achilles tendon, and intrinsic foot muscles to absorb harsh impacts. A comprehensive field guide on whether hiking boot insole upgrades are worth it shows that stock inserts collapse within the first few miles of sustained trail load.

By contrast, structured aftermarket footbeds increase the contact surface area under your foot. Distributing your weight across the heel, arch, and metatarsals reduces peak foot pressure by 30% to 75%. For hikers tackling uneven terrain or managing structural foot fatigue, upgrading to dedicated high arch support insoles stabilizes the midfoot, improves gait efficiency, and prevents unnecessary strain on the ankles and knees.
The Fatigue Peak and Injury Risk on the Trail
Trail fatigue is not just uncomfortable; it directly increases injury risk. Search-and-rescue data indicates that roughly 70% of hiking accidents happen between 12 PM and 6 PM. This critical afternoon window is known as the Fatigue Peak.
As your trek passes the four-to-six-hour mark, the stabilizing muscles along your lower legs and feet tire out. Your arches begin to sag, leading to overpronation, where your ankles roll inward with each step. This subtle breakdown in gait mechanics causes your knees to track improperly and severely slows your reaction time on loose scree or slick roots.
For hikers carrying heavy gear or navigating rugged ascents, using robust heavy duty insoles for over 220 lbs provides the rigid support required to prevent dynamic arch collapse. Holding your subtalar joint in neutral alignment helps protect you against painful ankle rollovers when your legs are exhausted.
Support vs Cushion: Balancing Impact and Stability
There is a common misconception that cloud-like, pillowy cushioning is the secret to trail comfort. In reality, excessive softness is the enemy of long-distance stability.
- Cushion-focused insoles use thick, squishy foam or gel to absorb immediate vertical impact. However, under the sustained weight of a multi-day pack, soft cushion simply bottoms out, leaving your foot unsupported.
- Support-focused insoles utilize semi-rigid or rigid arch shells paired with deep heel cups. Rather than flattening under load, they cradle the calcaneus (heel bone), maintaining the foot’s natural structural integrity and providing torsional rigidity on off-camber trails.
When deciding between custom orthotics vs off-the-shelf shoe inserts, most hikers find that premium, off-the-shelf options strike the sweet spot: they deliver firm, rigid guidance under the arch combined with resilient, high-density dampening foam under the forefoot.
Top Contenders: The Best Insoles for Hiking Boots Reviewed
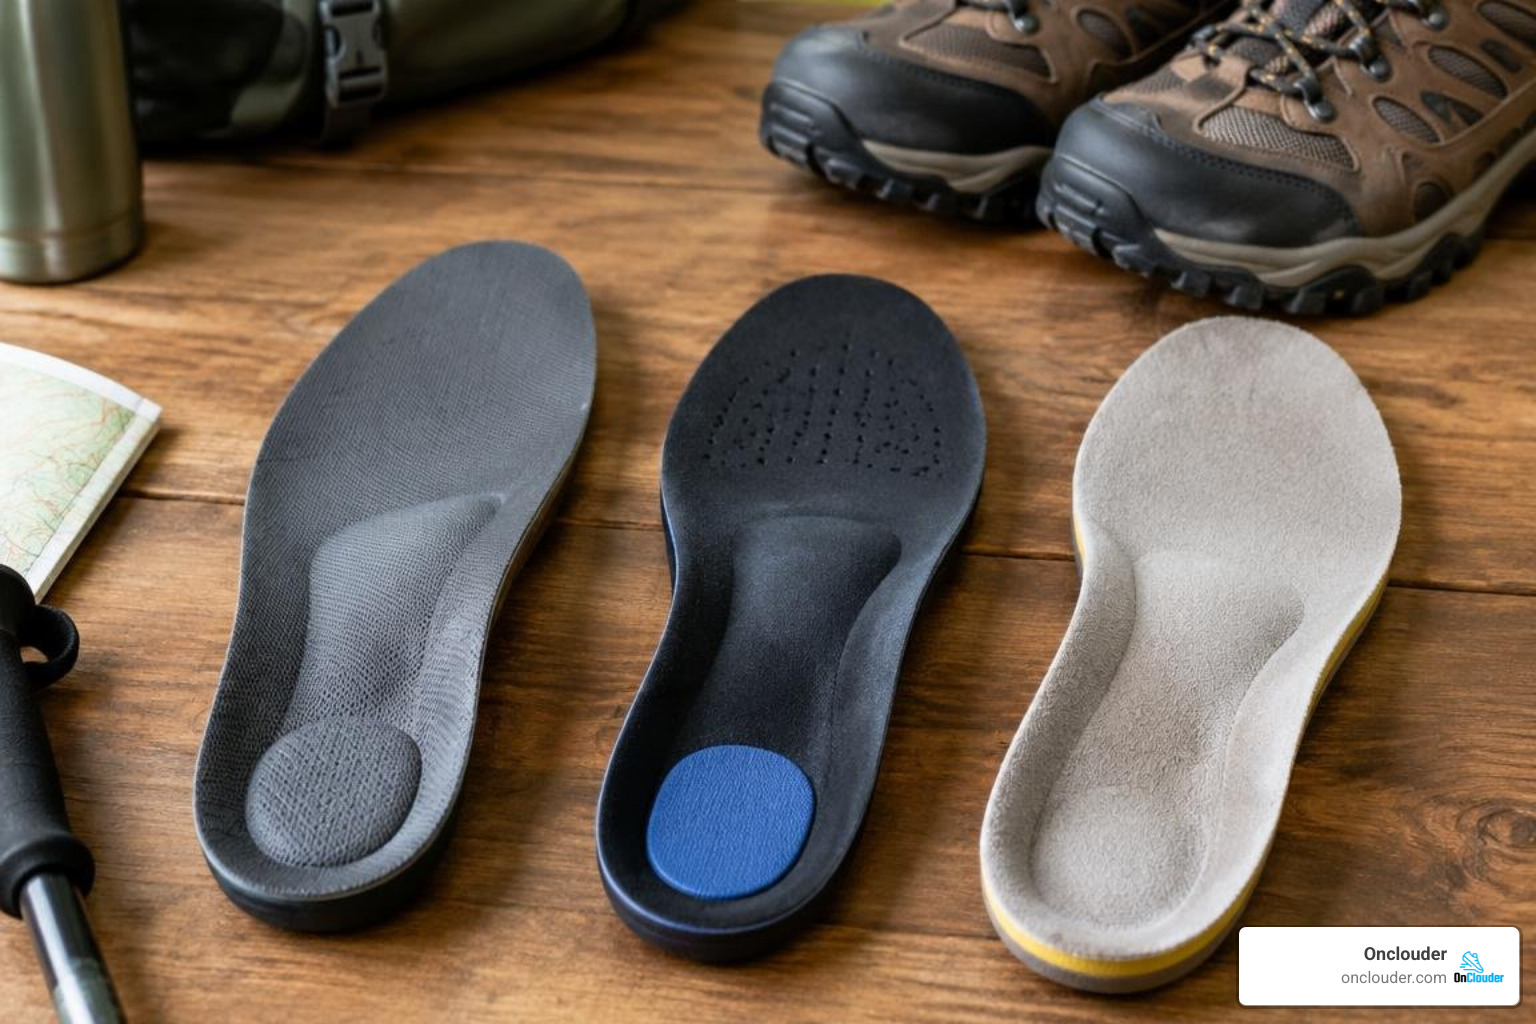
Finding the right footbed requires matching your foot shape, pack weight, and boot style to the appropriate internal support system. Below is a quick comparison of the top aftermarket options field-tested for technical trails and heavy loads:
| Insole Model | Primary Arch Support Type | Cushioning Foam | Durability Rating | Best Use Scenario |
|---|---|---|---|---|
| Rigid Carbon Fiber Hiking Insole | Rigid Carbon Fiber Cap | Dual-layer Comfort Foam | 500–700 miles | Heavy backpacking, rocky terrain, thru-hiking |
| Dynamic Arch Hiking Insole | Semi-Rigid Dynamic Arch Technology | Decoupled Recycled EVA & Poron® | 400–600 miles | Fast-and-light trekking, low-volume boots, trail agility |
| Firm Polypropylene Hiking Insole | Firm Polypropylene Arch Shell | Dual-layer Foam + EVA Base | 500–600 miles | Neutral arches, pronation relief, rugged day hikes |
| Wool-Lined Hiking Insole | Semi-Rigid Neutral Cradle | Dual-layer Cushioning with Wool Top | 400–500 miles | Cold-weather mountaineering, 4-season alpine treks |
Core Selection Criteria for the Best Insoles for Hiking Boots
To identify the best insoles for hiking boots, we evaluate several core performance metrics across varied trail conditions:
- Arch Geometry and Stiffness: The arch must hold its profile under full pack load without flexing flat.
- Heel Cradle Depth: A deep cup corrals the heel’s natural fatty pad, maximizing your body’s built-in shock absorption.
- Volume and Stack Height: The insert must fill excess volume without lifting your heel out of the boot’s designed heel lock.
- Moisture and Odor Management: Fast-drying materials prevent skin maceration and blister hotspots.
To explore options across different sports and conditions, browse our full insoles category overview.
Rigid Hiking Insole: Stability on Rocky Trails
For hikers navigating talus fields, technical scrambles, or thru-hikes with heavy multi-day packs, an ultra-rigid footbed with a carbon fiber and polymer stabilizer cap sets the benchmark. This design prevents torsional twisting on sharp, uneven rocks.
Its deep heel cradle centers the rearfoot, while dual-layer comfort foam absorbs repetitive shocks on hard descents. The structured carbon cap maintains its shape mile after mile, making it an exceptional choice for demanding trails.
- Pros: Unmatched torsional stability; long lifespan; robust heel alignment.
- Cons: High-volume profile requires boots with ample vertical room.
Dynamic Hiking Insole: Motion and Decoupled Heel
Hikers who prefer a more agile, responsive stride often favor a dynamic arch insole. Built around dynamic arch technology, this footbed guides the foot through its natural gait cycle rather than locking it into a completely rigid cast.
It features a fully decoupled heel, which allows your heel and forefoot to flex independently over rough terrain. Available in three distinct arch profiles (high, medium, low), it offers a personalized fit with an eco-friendly, breathable recycled EVA base.
- Pros: Highly adaptable arch profiles; slim fit works in low-volume boots; decoupled heel aids natural mobility.
- Cons: Provides slightly less rigid support under massive pack weights (>45 lbs).
Supportive Hiking Insole: Targeted Pronation Control and Cushioning
A supportive hiking insole with a firm polypropylene arch shell combines clinical-grade biomechanical alignment with rugged outdoor materials. Featuring a patented arch shape and a deep heel cradle, it controls moderate overpronation and eases tension along the plantar fascia.
Its dual-layer cushioning pairs a soft top foam with a resilient EVA base to absorb ground impacts. An odor-control polyester top cover reduces friction, keeping hotspots and blisters at bay during long days on the trail. For sub-zero expeditions, a wool-lined version delivers that same reliable arch structure paired with a temperature-regulating, moisture-wicking wool-blend top cover.
- Pros: Strong pronation correction; excellent heel cushioning; ready to use right out of the box.
- Cons: The firm arch shell can feel aggressive for hikers with very flat, sensitive arches.
Materials, Stack Height, and Moisture Dynamics
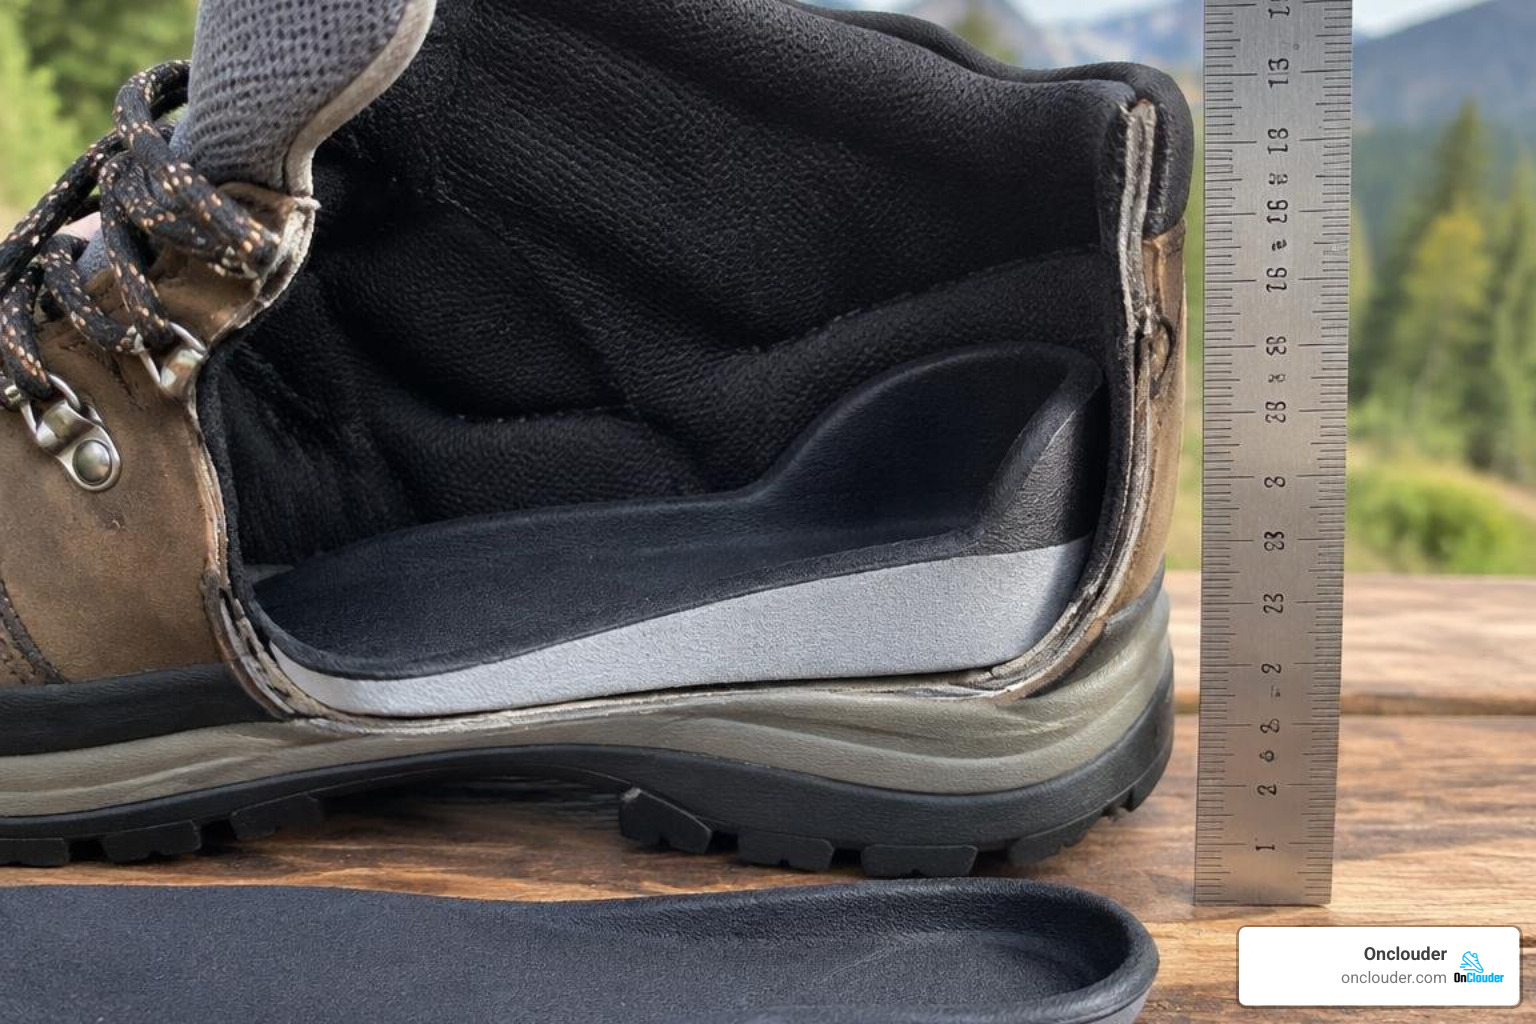
The performance of an aftermarket insole depends heavily on its materials and how its stack height interacts with your boot’s internal geometry. When pairing aftermarket footbeds with wide toe box hiking boots, you must ensure the forefoot has adequate width while the heel stays firmly seated.
A key fitting benchmark is the quarter-inch rule: an aftermarket insole should never lift your heel more than 0.25 inches higher than the factory footbed. If an insert is too thick in the rearfoot, your calcaneus will rise above the boot’s molded heel pocket, causing heel slip, heavy friction, and severe blisters.
EVA Foam vs Polyurethane and Carbon Fiber Durability
Insole longevity comes down to material density and compression resistance (measured on the Shore A hardness scale):
- Standard Open-Cell EVA Foam (Shore A 15–25): Soft and light, but exhibits a noticeable compression set within 200 to 300 miles under a heavy pack, losing its ability to cushion or rebound.
- High-Density Polyurethane (PU) (Shore A 35–55): Heavier than EVA, but resists compaction significantly better. PU maintains its shock-dampening qualities for 500 to 700 miles.
- Carbon Fiber & Reinforced Polymers (Shore A 55–75+): Ideal for structural arch caps. These materials do not compress, providing consistent support for the entire lifespan of your boots.
To check your footbeds, run a simple 30-second rebound test: press your thumb firmly into the arch and heel foam. If the material stays indented or takes longer than 30 seconds to snap back to its original shape, the foam’s cell walls have broken down and it is time for a replacement.
Moisture Management, Stream Crossings, and Temperature Control
Wet feet soften the skin (maceration), creating the perfect environment for painful blisters. Technical top covers made from brushed polyester or merino wool blends can reduce skin humidity around the heel by up to 24.41% compared to basic unlined foams.

During strenuous climbs, dense, non-breathable foam can raise internal shoe temperature by up to 2.73°C, accelerating perspiration. Choosing insoles with perforated airflow channels and dedicated moisture wicking insoles helps vent hot air away from your foot.
When you encounter inevitable stream crossings, closed-cell EVA bases absorb very little water weight (known as the Stream Crossing Tax) and dry substantially faster in camp than thick open-cell sponges.
Adapting the Best Insoles for Hiking Boots for High-Volume Boots vs Low-Volume Trail Runners
With roughly 87% of long-distance thru-hikers choosing trail runners over traditional boots, volume matching is more important than ever. Trail running shoes have shallower heel collars and lower internal volume than high-cut leather boots.
When outfitting low-volume shoes or roomier wide toe box hiking shoes, pick a slim-profile insole with a low stack height. For additional shoe reviews and trail-ready advice, check out our hiking shoes archive.
If you notice slight heel slippage after installing a new structured footbed, use a surgeon’s knot heel-lock lacing technique (threading the laces through the top eyelet loop) to lock your ankle down into the shoe’s heel pocket.
Frequently Asked Questions about Hiking Boot Insoles
Do I need to remove the factory insole before installing a hiking insole?
Yes, you must always take out the original factory liner. Stacking an aftermarket footbed on top of the stock insert adds excess stack height, pushing your foot upward. This crowds your toes against the top of the toe box and lifts your heel out of the boot’s molded heel counter, causing instant heel slippage and blisters.
How do I know when my hiking insoles need to be replaced?
Hiking footbeds should generally be replaced every 400 to 600 miles, or at the start of a major backpacking season. Perform two simple checks:
- The Two-Finger Flex Test: Hold the insole at the heel and ball of the foot and try to fold it in half. If the arch collapses easily, its structural rigidity is gone.
- The 30-Second Rebound Test: Press your thumb firmly into the heel cushioning. If it remains compressed or feels completely hard and non-resilient, the shock-absorbing foam has reached its functional limit.
Are custom orthotics worth the extra cost over premium hiking insoles?
For the vast majority of hikers, premium aftermarket insoles ($50–$60) deliver all the structured stability, heel cradling, and pressure distribution needed for long trail days.
Custom medical orthotics ($400–$600+) are usually only necessary for hikers with severe, medically diagnosed biomechanical issues, significant limb length discrepancies, or acute plantar fasciitis that does not respond to firm off-the-shelf support.
Conclusion
Upgrading your footbeds transforms your boots from generic footwear into a high-performance trail system. Replacing flat, unsupportive factory liners with rigid, anatomically contoured insoles reduces peak foot pressure, protects your joints during the Fatigue Peak, and helps keep your feet blister-free across rocky terrain.
Explore our comprehensive guide on arch support insoles for total foot relief to match the right support to your unique foot profile and make every mile on the trail feel easier.